Щекотливый users signup php. Отправляем письма активации
In this tutorial, I walk you through the complete process of creating a user registration system where users can create an account by providing username, email and password, login and logout using PHP and MySQL. I will also show you how you can make some pages accessible only to logged in users. Any other user not logged in will not be able to access the page.
If you prefer a video, you can watch it on my YouTube channel
The first thing we"ll need to do is set up our database.
Create a database called registration . In the registration database, add a table called users . The users table will take the following four fields.
- username - varchar(100)
- email - varchar(100)
- password - varchar(100)
You can create this using a MySQL client like PHPMyAdmin.
Or you can create it on the MySQL prompt using the following SQL script:
CREATE TABLE `users` (`id` int(11) NOT NULL AUTO_INCREMENT PRIMARY KEY, `username` varchar(100) NOT NULL, `email` varchar(100) NOT NULL, `password` varchar(100) NOT NULL) ENGINE=InnoDB DEFAULT CHARSET=latin1;
And that"s it with the database.
Now create a folder called registration in a directory accessible to our server. i.e create the folder inside htdocs (if you are using XAMPP server) or inside www (if you are using wampp server).
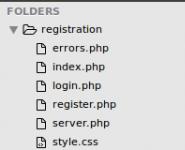
Inside the folder registration, create the following files:

Open these files up in a text editor of your choice. Mine is Sublime Text 3.
Registering a user
Open the register.php file and paste the following code in it:
regiser.php:
Register
Nothing complicated so far right?
A few things to note here:
First is that our form"s action attribute is set to register.php. This means that when the form submit button is clicked, all the data in the form will be submitted to the same page (register.php). The part of the code that receives this form data is written in the server.php file and that"s why we are including it at the very top of the register.php file.
Notice also that we are including the errors.php file to display form errors. We will come to that soon.
As you can see in the head section, we are linking to a style.css file. Open up the style.css file and paste the following CSS in it:
* { margin: 0px; padding: 0px; } body { font-size: 120%; background: #F8F8FF; } .header { width: 30%; margin: 50px auto 0px; color: white; background: #5F9EA0; text-align: center; border: 1px solid #B0C4DE; border-bottom: none; border-radius: 10px 10px 0px 0px; padding: 20px; } form, .content { width: 30%; margin: 0px auto; padding: 20px; border: 1px solid #B0C4DE; background: white; border-radius: 0px 0px 10px 10px; } .input-group { margin: 10px 0px 10px 0px; } .input-group label { display: block; text-align: left; margin: 3px; } .input-group input { height: 30px; width: 93%; padding: 5px 10px; font-size: 16px; border-radius: 5px; border: 1px solid gray; } .btn { padding: 10px; font-size: 15px; color: white; background: #5F9EA0; border: none; border-radius: 5px; } .error { width: 92%; margin: 0px auto; padding: 10px; border: 1px solid #a94442; color: #a94442; background: #f2dede; border-radius: 5px; text-align: left; } .success { color: #3c763d; background: #dff0d8; border: 1px solid #3c763d; margin-bottom: 20px; }
Now the form looks beautiful.
Let"s now write the code that will receive information submitted from the form and store (register) the information in the database. As promised earlier, we do this in the server.php file.
Open server.php and paste this code in it:
server.php
Sessions are used to track logged in users and so we include a session_start() at the top of the file.
The comments in the code pretty much explain everything, but I"ll highlight a few things here.
The if statement determines if the reg_user button on the registration form is clicked. Remember, in our form, the submit button has a name attribute set to reg_user and that is what we are referencing in the if statement.
All the data is received from the form and checked to make sure that the user correctly filled the form. Passwords are also compared to make sure they match.
If no errors were encountered, the user is registered in the users table in the database with a hashed password. The hashed password is for security reasons. It ensures that even if a hacker manages to gain access to your database, they would not be able to read your password.
But error messages are not displaying now because our errors.php file is still empty. To display the errors, paste this code in the errors.php file.
0) : ?>
When a user is registered in the database, they are immediately logged in and redirected to the index.php page.
And that"s it for registration. Let"s look at user login.
Login user
Logging a user in is an even easier thing to do. Just open the login page and put this code inside it:
Login
Everything on this page is quite similar to the register.php page.
Now the code that logs the user in is to be written in the same server.php file. So open the server.php file and add this code at the end of the file:
// ... // LOGIN USER if (isset($_POST["login_user"])) { $username = mysqli_real_escape_string($db, $_POST["username"]); $password = mysqli_real_escape_string($db, $_POST["password"]); if (empty($username)) { array_push($errors, "Username is required"); } if (empty($password)) { array_push($errors, "Password is required"); } if (count($errors) == 0) { $password = md5($password); $query = "SELECT * FROM users WHERE username="$username" AND password="$password""; $results = mysqli_query($db, $query); if (mysqli_num_rows($results) == 1) { $_SESSION["username"] = $username; $_SESSION["success"] = "You are now logged in"; header("location: index.php"); }else { array_push($errors, "Wrong username/password combination"); } } } ?>Again all this does is check if the user has filled the form correctly, verifies that their credentials match a record from the database and logs them in if it does. After logging in, the user is redirected them to the index.php file with a success message.
Now let"s see what happens in the index.php file. Open it up and paste the following code in it:
Home Page
Welcome
logout
The first if statement checks if the user is already logged in. If they are not logged in, they will be redirected to the login page. Hence this page is accessible to only logged in users. If you"d like to make any page accessible only to logged in users, all you have to do is place this if statement at the top of the file.
The second if statement checks if the user has clicked the logout button. If yes, the system logs them out and redirects them back to the login page.
Now go on, customize it to suit your needs and build an awesome site. If you have any worries or anything you need to clarify, leave it in the comments below and help will come.
You can always support by sharing on social media or recommending my blog to your friends and colleagues.
Создаем собственную страницу регистрации для мультисайта взамен стандартной wp-signup.php .
В обычной установке WordPress страницу регистрации (авторизации, сброса пароля) выводит файл wp-login.php .
- /wp-login.php - авторизация
- /wp-login.php?action=register - регистрация
- /wp-login.php?action=lostpassword - сброс пароля
Для мультисайта в wp-login.php есть отдельные условия. Так, при переходе по ссылке /wp-login.php?action=register на мультисайте, WordPress сделает редирект на страницу /wp-signup.php . Во многих темах страница выглядит не очень привлекательно, поэтому мы сделаем свою собственную.

Основной сайт сети
По умолчанию, WordPress открывает страницу регистрации (wp-signup.php) на основном домене (сайте) сети. Тем не менее, можно сделать отдельную страницу регистрации для каждого сайта сети, даже если у них разные темы. Мы будем рассматривать случай, когда на всех сайтах сети есть своя собственная страница регистрации, но используется одинаковая тема и сайты различаются лишь языком. Если используются разные темы, потребуется написать больше кода.
functions.php?
Нет. Имя этого файла, кажется, упоминается в любой статье про WordPress. В нашем случае, с учетом того, что функционал регистрации рассчитан на несколько сайтов, имеет смысл вынести его в MU-плагины, которые загружаются при открытии любого сайта.
Лирическое отступление
Стоит отметить, что MU-плагины загружаются раньше обычных плагинов и до полной загрузки ядра WordPress, поэтому вызов некоторых функций может привести к фатальным ошибкам в PHP. Подобная «ранняя» загрузка имеет и свои плюсы. Скажем внутри любой темы нельзя цепляться к некоторым экшенам, которые срабатывают еще до загрузки файла functions.php из темы. Примером этого могут служить экшены из плагина Jetpack вида jetpack_module_loaded_related-posts (related-posts - название модуля) с помощью которых возможно отслеживать активность модулей в Jetpack. К этому экшену невозможно «прицепиться» из файла темы, потому что экшен уже сработал до загрузки темы - плагины загружаются раньше тем. Взглянуть на общую картинку порядка загрузки WordPress можно на странице Action Reference в кодексе .
Порядок в файлах
MU-плагины могут содержать любое количество файлов и любую стуктуру, которая покажется вам логичной. Я придерживаюсь примерно такой иерархии:
|-mu-plugins |-|-load.php |-|-|-selena-network |-|-|-|-signup |-|-|-|-|-plugin.php |-|-|-|-|-... |-|-|-|-jetpack |-|-|-|-|-plugin.php
В файле load.php подключаются все необходимые «плагины» для нашей сети:
// Load Traslates for all addons load_muplugin_textdomain ("selena_network", "/selena-network/languages/"); // Network Signup require WPMU_PLUGIN_DIR . "/selena-network/signup/plugin.php"; // Another plugins // require WPMU_PLUGIN_DIR ...
Внутри папки selena-network хранятся папки плагинов, в каждой есть свой plugin.php , которые мы и подключаем в load.php . Это дает гибкость и возможность быстро отключать и включать некоторые вещи.
Адрес страницы регистрации
Чтобы указать адрес страницы регистрации, используется фильтр wp_signup_location . Его можно найти внутри файла wp-login.php и именно он отвечает за редирект на wp-signup.php .
Case "register" : if (is_multisite()) { wp_redirect(apply_filters("wp_signup_location", network_site_url("wp-signup.php"))); exit;
Добавим свою функцию в mu-plugins/selena-network/signup/plugin.php , которая будет отдавать адрес страницы регистрации на текущем сайте:
Function selena_network_signup_page ($url) { return home_url () . "/signup/"; } add_filter ("wp_signup_location", "selena_network_signup_page", 99);
selena_network - префикс, который я использую в именах всех функций внутри MU-плагинов на своем сайте для избежания коллизий, его следует заменить на свой собственный уникальный префикс. Приоритет добавления фильтра 99, потому что некоторые плагины, например bbPress и BuddyPress могут перезаписать этот адрес на свой собственный (MU-плагины загружаются раньше, чем обычные плагины, см. выше). Обратите внимание, что используется home_url() , вместо network_site_url() , чтобы оставить посетителя на том же домене. В качестве адреса можно использовать любой URL.
Создание страницы
Теперь создадим страницу с адресом site.com/signup/ через обычный интерфейс, а в папке дочерней темы шаблон для нашей новой страницы - page-signup.php . Вместо слова «signup» можно использовать уникальный ID.
Внутри нового шаблона необходимо выполнить вызов функции selena_network_signup_main() , которая будет выводить форму регистрации.
Стоит заметить, что весь процесс с шаблонами не обязателен и вместо этого можно создать свой шорткод, который будет также вызывать функцию selena_network_signup_main() .
wp-signup.php и wp-activate.php
Теперь займемся созданием функции, которая будет выводить форму регистрации. Для этого скопируем файлы wp-signup.php и wp-activate.php из корня WordPress в mu-plugings/selena-network/signup/ (и не забываем их подключить внутри mu-plugins/selena-network/signup/plugin.php). Дальнейшие манипуляции с файлами крайне сложно и долго описывать, поэтому прийдется сделать их самостоятельно. Я лишь опишу что именно надо сделать и опубликую исходные файлы своего проекта:
- В начале файла удалить все require , вызов функций и прочий код вне функций.
- Переименовать все функции, добавив к именам уникальные префиксы.
- Нижнюю часть кода wp-signup.php обернуть в функцию selena_network_signup_main и в ее самом начале написать global $active_signup; .
- Заменить верстку на свою собственную в нужных местах.
Внутри wp-activate.php необходимо сделать примерно тоже самое:
- Удалить весь код вне функций, обернуть верстку в отдельную функцию.
- Изменить верстку в местах, где это необходимо.
Файл wp-activate.php отвечает за страницу активации аккаунта. Как и со страницей регистрации для нее необходимо создать отдельный шаблон, внутри которого вызывать функцию из файла wp-activate.php .
Отправляем письма активации
Страница регистрации отправляет посетителю письмо со ссылкой на активацию аккаунта. По умолчанию этим занимается функция wpmu_signup_user_notification() из файла ms-functions.php . Ее функционал можно заимствовать для своей функции. Причина, по которой необходимо отказаться от использования этой функции - она отправляет ссылку активации аккаунта с wp-activate.php . «Выключить» же эту функцию можно с помощью фильтра wpmu_signup_user_notification отдавая по нему false (если этого не cделать, письмо активации будет отправляться дважды, окей, на самом деле два разных письма).
Function armyofselenagomez_wpmu_signup_user_notification($user, $user_email, $key, $meta = array()) { // ... // Код из функции wpmu_signup_user_notification() wp_mail($user_email, wp_specialchars_decode($subject), $message, $message_headers); return false; } add_filter("wpmu_signup_user_notification", "armyofselenagomez_wpmu_signup_user_notification", 10, 4);
В результате страница регистрации в теме Селена стала выглядеть намного чище и аккуратней.

Заключение
В интернете множество других не очень правильных способов того, как сделать тоже самое - редиректы Apache, AJAX-формы, которые не будут работать без Java Script и т. п. Все это мне не очень понравилось, поэтому я постарался сделать это максимально правильно на своем собственном сайте.
Замечу, что править файлы следует осторожно и стараться не сильно отходить от исходных, чтобы в дальнешйем, в случае если WordPress изменит файлы wp-signup.php и wp-activate.php , их проще было сравнивать между собой для поиска изменений.
Не забывайте смотреть в исходный код всех описанных выше функций, чтобы полностью разобраться с тем, что и как происходит внутри кода.
Бонус. Защита от спамеров
Даже самые маленькие сайты на WordPress часто подвергаются налету спам-регистраций. Можно писать бесконечные условия для фильтрации ботов, зачастую больше похожие на попытку создать искусственный интеллект 🙂 В случае мультисайта мне очень помог обычный редирект в Apache, с помощью которого при открытии /wp-signup.php и /wp-acitvate.php я попросил выдавать 404 (я не эксперт по настройке Apache, поэтому мои правила могут быть не очень правильными).
RewriteEngine On RewriteBase / RewriteRule ^wp-signup\.php - RewriteRule ^wp-activate\.php - # BEGIN WordPress # Правила от WordPress по умолчанию не трогаем:) # ... # END WordPress
P. S. Я стараюсь максимально детально описывать некоторые сторонние вещи, потому что когда начинал я, порой некому было подсказать и объяснить многие вещи. Также я считаю, что подобные небольшие наводки на другие материалы кого-нибудь подтолкнут к изучению чего-то нового и расширению своей области знаний. В записях RewriteRule используются регулярные выражения, они совсем не сложные, например, символ ^ означает начало строки.
Advertisements
Much of the websites have a registration form for your users to sign up and thus may benefit from some kind of privilege within the site. In this article we will see how to create a registration form in PHP and MySQL.
We will use simple tags and also we will use table tag to design the Sign-Up.html webpage. Let’s start:
Listing 1 : sign-up.html
Figure 1:
Description of sing-in.html webpage:
As you can see the Figure 1, there is a Registration form and it is asking few data about user. These are the common data which ask by any website from his users or visitors to create and ID and Password. We used table tag because to show the form fields on the webpage in a arrange form as you can see them on Figure 1. It’s looking so simple because we yet didn’t used CSS Style on it now let’s we use CSS styles and link the CSS style file with sing-up.html webpage.
Listing 2 : style.css
/*CSS File For Sign-Up webpage*/ #body-color{ background-color:#6699CC; } #Sign-Up{ background-image:url("sign-up.png"); background-size:500px 500px; background-repeat:no-repeat; background-attachment:fixed; background-position:center; margin-top:150px; margin-bottom:150px; margin-right:150px; margin-left:450px; padding:9px 35px; } #button{ border-radius:10px; width:100px; height:40px; background:#FF00FF; font-weight:bold; font-size:20px; }
Listing 3 : Link style.css with sign-up.html webpage

Figure 2:
Description of style.css file:
In the external CSS file we used some styles which could be look new for you. As we used an image in the background and set it in the center of the webpage. Which is become easy to use by the help of html div tag. As we used three div tag id’s. #button, #sing-up, and #body-color and we applied all CSS styles on them and now you can see the Figure 2, how much it’s looking beautiful and attractive. You can use many other CSS styles as like 2D and 3D CSS styles on it. It will look more beautiful than its looking now.
After these all simple works we are now going to create a database and a table to store all data in the database of new users. Before we go to create a table we should know that what we require from the user. As we designed the form we will create the table according to the registration form which you can see it on Figure 1 & 2.
Listing 3 : Query for table in MySQL
CREATE TABLE WebsiteUsers (userID int(9) NOT NULL auto_increment, fullname VARCHAR(50) NOT NULL, userName VARCHAR(40) NOT NULL, email VARCHAR(40) NOT NULL, pass VARCHAR(40) NOT NULL, PRIMARY KEY(userID));
Description of Listing 3:
One thing you should know that if you don’t have MySQL facility to use this query, so should follow my previous article about . from this link you will able to understand the installation and requirements. And how we can use it.
In the listing 3 query we used all those things which we need for the registration form. As there is Email, Full name, password, and user name variables. These variable will store data of the user, which he/she will input in the registration form in Figure 2 for the sing-up.
After these all works we are going to work with PHP programming which is a server side programming language. That’s why need to create a connection with the database.
Listing 4 : Database connection
Description of Listing 4:
We created a connection between the database and our webpages. But if you don’t know is it working or not so you use one thing more in the last check listing 5 for it.
Listing 5 : checking the connection of database connectivity
Description Listing 5:
In the Listing 5 I just tried to show you that you can check and confirm the connection between the database and PHP. And one thing more we will not use Listing 5 code in our sing-up webpage. Because it’s just to make you understand how you can check the MySQL connection.
Now we will write a PHP programming application to first check the availability of user and then store the user if he/she is a new user on the webpage.
Listing 6 : connectivity-sign-up.php
Description of connectivity-sign-up.php
In this PHP application I used simplest way to create a sign up application for the webpages. As you can see first we create a connection like listing 4. And then we used two functions the first function is SignUP() which is being called by the if statement from the last of the application, where its first confirming the pressing of sign up button. If it is pressed then it will call the SingUp function and this function will use a query of SELECT to fetch the data and compare them with userName and email which is currently entered from the user. If the userName and email is already present in the database so it will say sorry you are already registered
If the user is new as its currently userName and email ID is not present in the database so the If statement will call the NewUser() where it will store the all information of the new user. And the user will become a part of the webpage.

Figure 3
In the figure 3, user is entering data to sign up if the user is an old user of this webpage according to the database records. So the webpage will show a message the user is registered already if the user is new so the webpage will show a message the user’s registration is completed.

Figure 4:
As we entered data to the registration form (Figure 4), according to the database which userName and email we entered to the registration form for sing-up it’s already present in the database. So we should try a new userName and email address to sign-up with a new ID and Password.

Figure 5
In figure 5, it is confirming us that which userName and email id user has entered. Both are not present in the database records. So now a new ID and Password is created and the user is able to use his new ID and Password to get login next time.
Conclusion:
In this article we learnt the simplest way of creating a sign up webpage. We also learnt that how it deals with the database if we use PHP and MySQL. I tried to give you a basic knowledge about sign up webpage functionality. How it works at back end, and how we can change its look on front end. For any query don’t hesitate and comment.
I was trying to make a signup, login, logout php program all by myself for sometime now. Finally i think i made it. As i am a newbie in php coding, i would love if you guys can check it out and give me critics. Like where i can improve, what are the security threats that my code can result in or whatever:P/>.
This is all you gotta do:
1) Download all the 7 php and html files. (When i applied my logic i came out with 7 files!! :(/> All are small small codes prolly you guys can make it into one program lol)
2) Run the createdatabase.php first to create the database.
3) Use wamp or xampp or whatever u got to compile php and open homepage.html.
4) Yeah thats it, u have to register before you login anyways.
5) You might need to change the mysql_connect details in login.php and signup.php. I use the default localhost, root, (no password) to connect.
Or if you dont wanna download just see this code below:
Createdatabase.php
This is the form that has login and signup forms.
UBER COOL WEBSITE
Sign Up
Login
";
else
echo "Invalid Username
";
echo " Go back to login page ";
}
/*
1) We shouldnt allow similar usernames. (Y)
2) make the go back to login page work. (Y)
3) We shouldnt allow null usernames and passwords.(Y)
*/
?>
Go back to login page "; } else { $_SESSION["access"]=1; $_SESSION["user"]=$_POST; header("Location: website.php"); } mysql_close($con); /* 1) Currently, just a message is printed when u type a correct password and another one, when its a wrong password. What i want in the future is a message when its wrong password and a NEW PAGE WHICH IS NOT ACCESSIBLE WITHOUT THE PASSWORD IN ANYWAYS if its a correct password. If the link to that page is written directly without logging in, you will be redirected to the login page. No one can no way access a profile without having an account in the website.(Y) 2) Give a password to the server. 3) The new page into which the user goes when they type the correct password is the user profile. 4) There should be an option for deleting the profile in the profile page. Also u can upload a display picture, write about me and stuff. */ ?>
Access.php
Website.php (The website to which a user who login connects to. It also contains the logout button.
UBER COOL WEBSITE
Welcome to the uber-cool-website
Thanks a lot to everyone who says hello in this thread:D/>
Laravel requires Composer to manage the project dependencies. So before installing Laravel, make sure you have Composer installed on your system. In case you are hearing about Composer for the first time, it"s a dependency management tool for php similar to node"s npm.
To install Composer on your machine, check this post:
Installing Laravel on Windows:
Follow the below steps to install laravel on windows machine. No matter you have xampp/wamp stack, it works for both. On WAMP, make sure to install laravel on "www" folder and on XAMPP, obviously the "htdocs".
STEP-1) Open "htdocs" folder on XAMPP, hold SHIFT key and right click on the folder, and choose "open command window here". Alternatively, you can open command window and change directory to "xampp/htdocs".
STEP-2) Enter the following command.
Composer create-project laravel/laravel my_laravel_site --prefer-dist
Here "my_laravel_site" is the folder name where laravel files will be installed. Change this to your liking.
STEP-3) Now it"s time to be patient as laravel installation is going to take some time.
STEP-4) Once installed, change directory to "my_laravel_site" (cd "my_laravel_site") on the command prompt and enter the below command.
Php artisan serve
STEP-5) This will show a message something like, "Laravel development server started:" along with an url.
STEP-6) Copy and paste the url on the browser. If things go right, you"d see the laravel welcome screen.

STEP-7) Done! You have successfully installed laravel on windows machine and ready to go with.
Setting Application Key:
Laravel requires little configuration after installation. It requires you to set the application key. This is a random string of 32 characters long used for encrypting session and other sensitive data. Usually this will be set automatically when you install laravel via composer or laravel installer.
In case it"s not set, you have to do it manually. First make sure to rename the ".env.example" file to ".env" on your application root. Then open command prompt and change to the laravel project folder. Now run the below command to generate the key.
Php artisan key:generate
Copy this generated key to the APP_KEY variable on ".env" file. Save and you are done.
Installing Specific Laravel Version:
The above given method will make composer to download and install the latest version of laravel. If you want to install earlier versions of laravel on your machine, make sure to include the respective version number on create-project command.
Composer create-project laravel/laravel=5.4 your-project-name --prefer-dist Read Also:
Likewise you can easily install laravel using composer on windows . I hope you find this tutorial useful. Please share it on your social circle if you like it.